Geofences setup tutorial
Geofences are a great way to automatically get notifications when your kids are arriving or leaving some places. Nice example would be to see when your kids are coming and leaving the school or home.
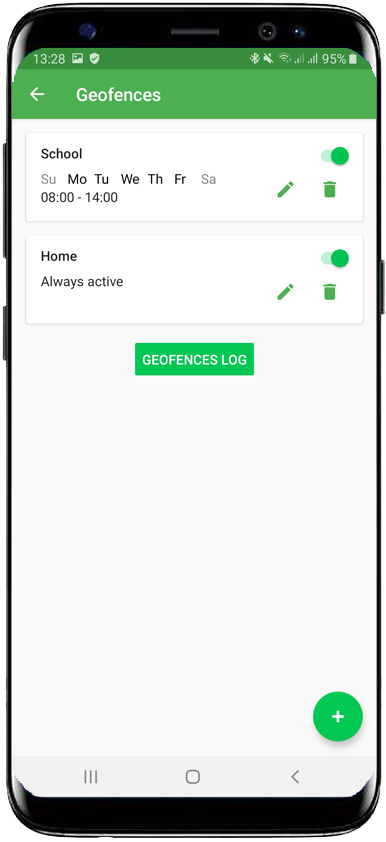
How to add new Geofence:
- Click “Plus” button on Geofences list
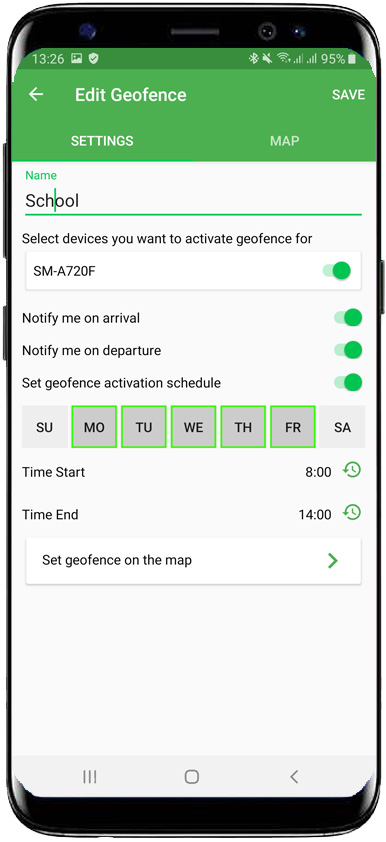
- Enter Geofence name. This can’t be empty and must differ from other geofences you’ve set
- Select devices that geofence will be applied to (no point to include the tablet that stays at home into the list)
- Choose to receive notifications on arrival and/or departure.
- If you would like to activate geofence only at some specified days and time, enable the schedule.
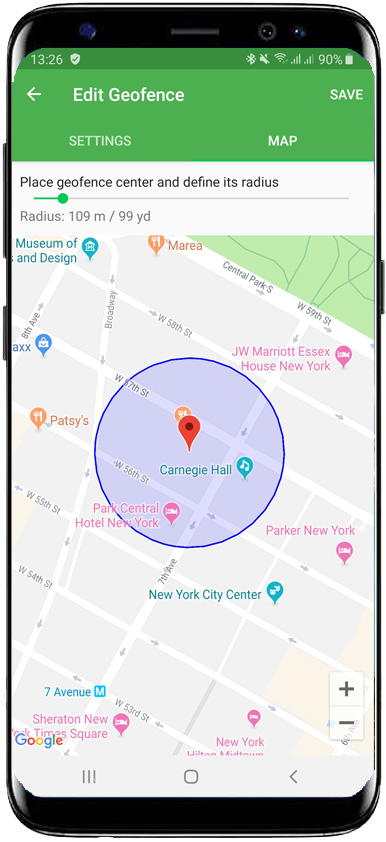
- Hit “Set geofence on the map” button
- Find the center of the geofence on the map and tap it
- Set radius above the map to completely cover the required area
- Tap “Save”
How to edit existing Geofence:
- On geofence list tap Pencil icon to edit
- Follow steps from “How to add new geofence” guide in this document
How to disable existing Geofence:
- Use switch on geofences list to temporary disable any geofence
How to remove existing geofence:
- Click Trash can icon on geofence list
- Confirm your action
Important notices about GPS:
- Geolocation must be enabled on kid’s device
- Kid device must be online through mobile network or Wi-Fi
- GPS is not extremely precious, especially in cities. Each point on the map is accompanied by a circle, indentifying accuracy
- Due to battery and traffic saving GPS coordinates are updated once per 5 minutes
Please note, any changes you do in Teen Time app will reach your children’s devices within few minutes and requires mobile internet or Wi-Fi connection available. If the connection is not available when you did your changes, settings will be delivered on kids devices as soon as they will go online.